The kitchen in our family home where I grew up had a space for an eat-in table. When I was quite young, my father built a table and benches into that space. The table and benches were just large enough for our family of six, and we ate most of our family meals there. If you were the first one in on either side of the table, you were stuck there until everyone else got out. But it was an efficient use of the small space, and I have many fond memories of meals at that table.
When Dad built the table and benches, there was a register for the forced-air heating that had to be covered up by one of the benches. Dad put a slot beneath the bench above the register, just where the support for the bench and the bench seat came together. The seat above the register was considered the prime seat in the winter, because it was always toasty warm. The slot, however, proved to have an unintended negative side effect.
One day, Mom decided to serve Brussels sprouts. In my brother Jerry's defense (and you will soon see why he needs defending), Mom's Brussels sprouts weren't very good. I believe they were frozen, and boiled, and overcooked at that. Overcooked Brussels sprouts, especially if they are just boiled, can be nasty. The overcooking enhances the sulfur compounds in the sprouts, and they just taste strong and not very nice. I don't think any of us liked them, but Jerry especially disliked them.
Now, Mom and Dad were eat-what's-set-before-you kind of people. "I don't like it" was no excuse for not eating healthy, nutritious food that was served. (Actually, by the time my youngest brother Jeff came along, Mom sort of gave that attitude up, but that's a story for another blog post.) So Jerry was expected to eat his Brussels sprouts.
And, indeed, the Brussels sprouts disappeared from his plate, so Mom and Dad assumed he had eaten them. This was not the case. Jerry had been sitting on the seat above the heat register that evening, and he had surreptitiously taken his Brussels sprouts, and slipped them into that slot just below his seat, where they fell to the floor, inside the built-in bench.
Jerry's deceit was discovered when, a day or so later, a smell of rotting food began to emanate from beneath the bench, beside the register. As the Brussels sprouts decayed, the rotting was enhanced by the warm air coming out of the heat register. The smell was foul, and there was no way to clean it up, short of completely demolishing the built-in table and bench, which wasn't an option. So we just had to put up with the stench until the Brussels sprouts had completely decayed and stopped stinking.
There are better ways to cook Brussels sprouts. They are delicious just drizzled with olive oil, salt, and pepper, and roasted. Here is another yummy way to serve them. Of course, the bacon and butter probably negate any positive health effect from the sprouts, but what fun is life without bacon and butter? This recipe also works well with broccoli, so I've included that recipe as well, even though it's nearly identical.
Brussels Sprouts Sauteed with Bacon
1 lb. Brussels sprouts
8 strips bacon
2 T. butter
1/2 tsp. salt
Peel the leaves from the sprouts, and thinly slice the innermost heads, discarding the cores. Set aside. (You could also just slice the sprouts thinly, or cut the sprouts in quarters.)
Dice the bacon. Saute in a frying pan until crisp. Remove the bacon bits from the fat, and drain off all but a tablespoon or two of the bacon fat. Add the butter and melt. Stir in the Brussels sprouts leaves and the salt, and saute until tender, about 15-20 minutes. Remove the Brussels sprouts to a serving dish, and sprinkle with the bacon bits and some freshly ground pepper to taste. Serve piping hot as an accompaniment to a roast.
Broccoli Sauteed with Bacon
1 lb. broccoli
8 strips bacon
2 T. butter
1/2 tsp. salt
Cut the florets from the broccoli. Peel and discard the tough skin from the broccoli stems, and slice the stems. Set aside.
Dice the bacon. Saute in a
frying pan until crisp. Remove the bacon bits from the fat, and drain
off all but a tablespoon or two of the bacon fat. Add the butter and
melt. Stir in the prepared broccoli and the salt, and saute until tender-crisp, about
15-20 minutes. Remove the broccoli to a serving dish, and
sprinkle with the bacon bits and some freshly ground pepper to taste. Serve piping hot as an accompaniment to a roast.
Saturday, November 15, 2014


Sunday, November 9, 2014
Seafood Chowder
Yesterday for my birthday brunch, my dear friend Patti gave me a big hunk of smoked salmon to make a frittata. It was delicious. But after slicing all the salmon thinly, I was left with a big piece of salmon skin, which was fully of smoky salmon flavor, but inedible on its own. Patti and I wondered if it might make a decent soup, with some potatoes and leek.
And then today, I remembered that the last time I had eaten lobster, I had cooked the shells and made a stock and put it in the freezer, and forgotten about it. So I sauteed an onion and a few cloves of garlic in a couple of tablespoons of butter, added the frozen lobster stock, and diced about 5 medium potatoes and chopped one large leek, added the smoked salmon skin, and cooked everything together for an hour or so.
Then I remembered I had some vacuum-frozen pollack fillets in the freezer, as well. So I defrosted them, cut them into bite-sized pieces, and added them to the soup, along with about a cup of corn I froze in September. Then I made a white sauce with some butter, flour, and milk, thickened it, and added it to the soup, along with a teaspoon of sea salt. Since I'd cooked all the flavor out of the salmon skin, I took it out and fed it to the dog, who gobbled it up gratefully.

So now my home is filled with the glorious smell of seafood chowder. I can't really give you an exact recipe, because I didn't measure anything, but it is the most delicious soup I've made in ages.
And then today, I remembered that the last time I had eaten lobster, I had cooked the shells and made a stock and put it in the freezer, and forgotten about it. So I sauteed an onion and a few cloves of garlic in a couple of tablespoons of butter, added the frozen lobster stock, and diced about 5 medium potatoes and chopped one large leek, added the smoked salmon skin, and cooked everything together for an hour or so.
Then I remembered I had some vacuum-frozen pollack fillets in the freezer, as well. So I defrosted them, cut them into bite-sized pieces, and added them to the soup, along with about a cup of corn I froze in September. Then I made a white sauce with some butter, flour, and milk, thickened it, and added it to the soup, along with a teaspoon of sea salt. Since I'd cooked all the flavor out of the salmon skin, I took it out and fed it to the dog, who gobbled it up gratefully.
So now my home is filled with the glorious smell of seafood chowder. I can't really give you an exact recipe, because I didn't measure anything, but it is the most delicious soup I've made in ages.
Saturday, October 25, 2014
Today's Brunch Menu: Yummy Food!
Those of you who are my friends on Facebook (which is, essentially, everyone who reads this blog) are familiar with my regular Saturday status updates, which always begin "Today's brunch menu: ..." and then proceed to list the yummy things I have made for that Saturday's brunch. What you may not know is how the tradition of Saturday brunches began.
On one Friday evening in May of 2011, my friend Marj Steinman rang my doorbell. I've known Marj ever since I moved to Montreal in October of 1980. She moved to Montreal in the same year as I did. Marj is from a Mennonite family in the Kitchener-Waterloo area of Ontario, and we have attended the same church ever since we both moved here. Marj is a single mother, and since I moved to my current home in May 2007, has also been my neighbor. She has a key to my apartment, comes over and helps me get things done I can't do myself, and takes my dog for walks for me, and takes care of him when I'm away. Since she's a neighbor, it's not really that unusual for her to ring my doorbell.
But this Friday night was different. I opened the door, and there was Marj - but her left eye was black and blue and completely swollen shut. "What happened to you?" I asked, alarmed. "James hit me," she said. Now, James was her roommate at the time (fortunately, not a romantic relationship, just someone who shared the apartment to help with the expenses). I'd had my doubts about him, although he had never been violent with her before. But this day, they had been arguing, and he had clocked her in the cheekbone with an uppercut.
Marj explained that she had spent the day at the hospital, and that her cheekbone was broken. She asked if she could spend the night on my sofa. "Of course!" I said, "but we're calling the police." And we did. The police came. One of the officers stayed in my apartment and took Marj's detailed statement. The other one left and went to Marj's apartment and arrested James and took him off to jail. (He eventually plead guilty to assault, and was sentenced to probation, with a restraining order which prohibits him from approaching Marj either directly or indirectly.) It was a stressful evening.
So Marj spent the night on my sofa. In the morning, we got up, and I told Marj that I usually cooked myself a nice breakfast on Saturday, and that she was welcome to stay for brunch. I don't remember what I cooked that day, but Marj did the dishes for me afterwards.
And Saturday brunch was born. The next Saturday, I invited Marj to brunch again. And then it just began happening automatically. Invitations were no longer needed. The deal is that I provide the food and the cooking, and Marj does the dishes. (She even does the dishes that I don't do during the week, bless her heart!) We have had brunch most Saturdays since that first one - the only exceptions have been when I've been away or sick, and when I was in the hospital.
Since I was cooking brunch on Saturdays anyway, it made it easy to invite other people as well. Eventually my friend Patti from work came for a few times, and then asked, "Is this a standing invitation?" and of course I said yes, so she's usually there, as well.

Most brunches consist of a frittata, home fries, and a baked item, although some days I've skipped the frittata and made pancakes, or sausage gravy with biscuits. I'll give you my basic frittata recipe, my home fries recipe, and recipes for some of my baked items.
Frittata
A frittata is the Italian version of an omelet. But unlike an omelet, which is cooked very quickly over high heat, and which is cooked individually for each person, a frittata is cooked very slowly over low heat, and only one frittata is made for the group. The frittata is served in wedges, like a quiche.
2-3 cups frittata fillings. Use your imagination here. Ingredients I commonly use for frittata fillings are: spinach (fresh or frozen), mushrooms, corn, peas, ham, bacon, leeks, lettuce (cooked lettuce is absolutely delicious, and has a flavor completely unlike raw lettuce), onions, garlic, broccoli, Swiss chard, and even radishes. But don't be limited by this list! Mix and match the ingredients, and anything else you think would be good. This is a great way to use leftover veggies, by the way.
3-4 T. butter
5 or 6 large eggs
1 tsp. salt
1-2 cups shredded cheese. If you want a true Italian frittata, you would use nothing but the best Parmigiano Reggiano. I can't afford that on a regular basis, so I use sharp cheddar. But I've also been known to use
Emmenthal, goat cheese, a combination of leftover cheeses from a pot-luck, and even cream cheese for one particularly memorable frittata that involved smoked salmon, onions, and capers.
First, saute the vegetables and/or meat fillings in the butter in an oven-proof skillet. I do this on medium-high heat, until the vegetables are cooked but not browned. If you are using fresh vegetables, it will take a little longer, but if you are using leftovers, this will be very quick indeed.
Meanwhile, whisk the eggs together with the salt, and add the shredded cheese to the eggs. If the filling has absorbed all the butter, add a tablespoon or two more to the vegetables. Then pour the eggs and cheese into the filling and make sure the eggs are thoroughly distributed. Immediately reduce the heat to the lowest possible setting. Do not stir. Let the frittata cook for about 12 minutes.
Meanwhile, preheat the broiler. After 12 minutes, once the eggs have set (they may still be a bit runny on top), put the skillet under the broiler for about 2 or 3 minutes. You do NOT want to brown the frittata, you just want to make sure the eggs are set on top.
Remove from the broiler. Let the frittata rest for a few minutes, and then tilt and slide it onto a serving plate (this part can be a bit tricky). The frittata can be cut into wedges at the table. You can also cut the wedges and put them on the plates before serving.
Home Fries (Spicy)
2 1/2 lbs potatoes (about 8 medium), more or less
1/4 cup vegetable oil (I usually use canola)
1 chopped onion
5 cloves garlic, minced
5 hot chilies (chopped) or 1-2 tsp cayenne pepper (more or less, depending on your tolerance for spicy food)
1 T. sea salt (I buy coarse Portuguese sea salt)
2 T. chopped fresh rosemary leaves or 2 tsp. dried rosemary leaves (optional)
A large cast-iron skillet
Put the vegetable oil into the cast-iron skillet, and set heat at medium-high. Dice the potatoes into large dice, and add to the vegetable oil. Add the minced garlic, chopped chilies, sea salt, and rosemary if you're using it. Turn the potatoes in the oil with a spatula until the potatoes, garlic, chilies, and salt are well distributed, and everything has a thin film of oil. Cover and reduce the heat to medium low.
Every 15 minutes or so, remove the cover, and, using a good metal spatula, turn the potatoes, being sure to scrape up any crusty bits. After the potatoes have cooked through, remove the cover permanently, but continue to turn every so often, so as to ensure the potatoes get crusty on all sides. Towards the end of the cooking you will need to turn them a bit more frequently.
The potatoes will be ready after about an hour and a half. Some people parboil their potatoes to make them cook faster. While it does indeed make them cook faster, I don't think they have the same satisfying texture of crusty on the outside and creamy on the inside that home fries cooked from raw potatoes have. Besides, when I'm making brunch, the rest of the things I have to make take that long anyway, so I just put the potatoes on at 9:30, and they're ready for brunch at 11:00.
Baked Oatmeal
This recipe is a brunch favorite of mine. The thing I love about baked oatmeal is that it is never gluey, as traditional oatmeal can be. This makes a lot of oatmeal, but it can be refrigerated and reheated (or even eaten cold like apple crisp).
1/2 c. oil
1/2 - 3/4 c. brown sugar
2 eggs
1 c. milk
3 c. oatmeal
2 tsp. baking powder
1 tsp. salt
1/2 tsp cinnamon
1/2 cup raisins or dried cranberries (optional)
1/4 cup nuts (optional)
4 sliced apples
Grease a 7 x 11 x 2 inch baking dish, and line with the sliced apples.
Mix oil, brown sugar, eggs and milk together. Mix into remaining dry
ingredients until moistened. Pour on top of apples into baking dish.
Bake at 350 for 30 minutes. Serve with milk. Serves 8-9.
You can also add other ingredients, if so desired - a cup or two of fresh cranberries, some sliced peaches, some fresh blueberries, or some sliced bananas.
Blueberry Crumb Muffins
Dry ingredients:
2 cups flour
1/2 tsp salt
1 T. baking powder
1/2 cup sugar
Wet ingredients:
1 egg
3/4 cup milk
1/4 cup vegetable oil
1 cup blueberries
Crumb topping:
4 T. softened butter
4 T. flour
3 T. brown sugar
Combine the dry ingredients in one bowl, and beat the egg and add the milk, oil, and blueberries to another. Pour the wet ingredients into the dry, and stir just until moistened.
Spray cooking spray in muffin tins (or grease them) and fill with batter. Combine softened butter with the flour and sugar to make crumbs, and sprinkle the crumbs on top.
Bake at 425º for 20 minutes. Makes 12 regular or 6 large muffins.
On one Friday evening in May of 2011, my friend Marj Steinman rang my doorbell. I've known Marj ever since I moved to Montreal in October of 1980. She moved to Montreal in the same year as I did. Marj is from a Mennonite family in the Kitchener-Waterloo area of Ontario, and we have attended the same church ever since we both moved here. Marj is a single mother, and since I moved to my current home in May 2007, has also been my neighbor. She has a key to my apartment, comes over and helps me get things done I can't do myself, and takes my dog for walks for me, and takes care of him when I'm away. Since she's a neighbor, it's not really that unusual for her to ring my doorbell.
But this Friday night was different. I opened the door, and there was Marj - but her left eye was black and blue and completely swollen shut. "What happened to you?" I asked, alarmed. "James hit me," she said. Now, James was her roommate at the time (fortunately, not a romantic relationship, just someone who shared the apartment to help with the expenses). I'd had my doubts about him, although he had never been violent with her before. But this day, they had been arguing, and he had clocked her in the cheekbone with an uppercut.
Marj explained that she had spent the day at the hospital, and that her cheekbone was broken. She asked if she could spend the night on my sofa. "Of course!" I said, "but we're calling the police." And we did. The police came. One of the officers stayed in my apartment and took Marj's detailed statement. The other one left and went to Marj's apartment and arrested James and took him off to jail. (He eventually plead guilty to assault, and was sentenced to probation, with a restraining order which prohibits him from approaching Marj either directly or indirectly.) It was a stressful evening.
So Marj spent the night on my sofa. In the morning, we got up, and I told Marj that I usually cooked myself a nice breakfast on Saturday, and that she was welcome to stay for brunch. I don't remember what I cooked that day, but Marj did the dishes for me afterwards.
And Saturday brunch was born. The next Saturday, I invited Marj to brunch again. And then it just began happening automatically. Invitations were no longer needed. The deal is that I provide the food and the cooking, and Marj does the dishes. (She even does the dishes that I don't do during the week, bless her heart!) We have had brunch most Saturdays since that first one - the only exceptions have been when I've been away or sick, and when I was in the hospital.
Since I was cooking brunch on Saturdays anyway, it made it easy to invite other people as well. Eventually my friend Patti from work came for a few times, and then asked, "Is this a standing invitation?" and of course I said yes, so she's usually there, as well.
Most brunches consist of a frittata, home fries, and a baked item, although some days I've skipped the frittata and made pancakes, or sausage gravy with biscuits. I'll give you my basic frittata recipe, my home fries recipe, and recipes for some of my baked items.
Frittata
A frittata is the Italian version of an omelet. But unlike an omelet, which is cooked very quickly over high heat, and which is cooked individually for each person, a frittata is cooked very slowly over low heat, and only one frittata is made for the group. The frittata is served in wedges, like a quiche.
2-3 cups frittata fillings. Use your imagination here. Ingredients I commonly use for frittata fillings are: spinach (fresh or frozen), mushrooms, corn, peas, ham, bacon, leeks, lettuce (cooked lettuce is absolutely delicious, and has a flavor completely unlike raw lettuce), onions, garlic, broccoli, Swiss chard, and even radishes. But don't be limited by this list! Mix and match the ingredients, and anything else you think would be good. This is a great way to use leftover veggies, by the way.
3-4 T. butter
5 or 6 large eggs
1 tsp. salt
1-2 cups shredded cheese. If you want a true Italian frittata, you would use nothing but the best Parmigiano Reggiano. I can't afford that on a regular basis, so I use sharp cheddar. But I've also been known to use
Emmenthal, goat cheese, a combination of leftover cheeses from a pot-luck, and even cream cheese for one particularly memorable frittata that involved smoked salmon, onions, and capers.
First, saute the vegetables and/or meat fillings in the butter in an oven-proof skillet. I do this on medium-high heat, until the vegetables are cooked but not browned. If you are using fresh vegetables, it will take a little longer, but if you are using leftovers, this will be very quick indeed.
Meanwhile, whisk the eggs together with the salt, and add the shredded cheese to the eggs. If the filling has absorbed all the butter, add a tablespoon or two more to the vegetables. Then pour the eggs and cheese into the filling and make sure the eggs are thoroughly distributed. Immediately reduce the heat to the lowest possible setting. Do not stir. Let the frittata cook for about 12 minutes.
Meanwhile, preheat the broiler. After 12 minutes, once the eggs have set (they may still be a bit runny on top), put the skillet under the broiler for about 2 or 3 minutes. You do NOT want to brown the frittata, you just want to make sure the eggs are set on top.
Remove from the broiler. Let the frittata rest for a few minutes, and then tilt and slide it onto a serving plate (this part can be a bit tricky). The frittata can be cut into wedges at the table. You can also cut the wedges and put them on the plates before serving.
Home Fries (Spicy)
2 1/2 lbs potatoes (about 8 medium), more or less
1/4 cup vegetable oil (I usually use canola)
1 chopped onion
5 cloves garlic, minced
5 hot chilies (chopped) or 1-2 tsp cayenne pepper (more or less, depending on your tolerance for spicy food)
1 T. sea salt (I buy coarse Portuguese sea salt)
2 T. chopped fresh rosemary leaves or 2 tsp. dried rosemary leaves (optional)
A large cast-iron skillet
Put the vegetable oil into the cast-iron skillet, and set heat at medium-high. Dice the potatoes into large dice, and add to the vegetable oil. Add the minced garlic, chopped chilies, sea salt, and rosemary if you're using it. Turn the potatoes in the oil with a spatula until the potatoes, garlic, chilies, and salt are well distributed, and everything has a thin film of oil. Cover and reduce the heat to medium low.
Every 15 minutes or so, remove the cover, and, using a good metal spatula, turn the potatoes, being sure to scrape up any crusty bits. After the potatoes have cooked through, remove the cover permanently, but continue to turn every so often, so as to ensure the potatoes get crusty on all sides. Towards the end of the cooking you will need to turn them a bit more frequently.
The potatoes will be ready after about an hour and a half. Some people parboil their potatoes to make them cook faster. While it does indeed make them cook faster, I don't think they have the same satisfying texture of crusty on the outside and creamy on the inside that home fries cooked from raw potatoes have. Besides, when I'm making brunch, the rest of the things I have to make take that long anyway, so I just put the potatoes on at 9:30, and they're ready for brunch at 11:00.
Baked Oatmeal
This recipe is a brunch favorite of mine. The thing I love about baked oatmeal is that it is never gluey, as traditional oatmeal can be. This makes a lot of oatmeal, but it can be refrigerated and reheated (or even eaten cold like apple crisp).
1/2 c. oil
1/2 - 3/4 c. brown sugar
2 eggs
1 c. milk
3 c. oatmeal
2 tsp. baking powder
1 tsp. salt
1/2 tsp cinnamon
1/2 cup raisins or dried cranberries (optional)
1/4 cup nuts (optional)
4 sliced apples
Grease a 7 x 11 x 2 inch baking dish, and line with the sliced apples.
Mix oil, brown sugar, eggs and milk together. Mix into remaining dry
ingredients until moistened. Pour on top of apples into baking dish.
Bake at 350 for 30 minutes. Serve with milk. Serves 8-9.
You can also add other ingredients, if so desired - a cup or two of fresh cranberries, some sliced peaches, some fresh blueberries, or some sliced bananas.
Blueberry Crumb Muffins
Dry ingredients:
2 cups flour
1/2 tsp salt
1 T. baking powder
1/2 cup sugar
Wet ingredients:
1 egg
3/4 cup milk
1/4 cup vegetable oil
1 cup blueberries
Crumb topping:
4 T. softened butter
4 T. flour
3 T. brown sugar
Combine the dry ingredients in one bowl, and beat the egg and add the milk, oil, and blueberries to another. Pour the wet ingredients into the dry, and stir just until moistened.
Spray cooking spray in muffin tins (or grease them) and fill with batter. Combine softened butter with the flour and sugar to make crumbs, and sprinkle the crumbs on top.
Bake at 425º for 20 minutes. Makes 12 regular or 6 large muffins.
Saturday, February 5, 2011
Rubik's Cube Cake
My brother Jeff and his wife Ann host a fabulous Super Bowl party at their house every year. Lots of people come, and a grand time is had by all. It's a pot-luck party, and everybody brings great food. Usually, the actual Super Bowl ends up being anti-climactic, compared to all the fun and food!
Our cousin Steve's son Ryan loves Rubik's cubes. So this year, for the Super Bowl party, Jeff made a cake in the form of a Rubik's Cube. Here's a picture of the finished product. Isn't it amazing?

Here's how he made it.
Ingredients:
3 boxes of Betty Crocker cake mix. Jeff used 2 boxes of Super Moist Milk Chocolate and 1 of French Vanilla, but said he got the best results from the French Vanilla
1 container Betty Crocker Milk Chocolate Icing
2 containers Betty Crocker Whipped Vanilla Icing
2 tubes black Cake Mate icing
1 tube each red, blue, green, yellow, orange, and white Cake Mate icing
First, Jeff baked the cakes. He followed the instructions on the box, but to each mix added one extra egg, and used 1/2 cup less water than called for. He baked each cake into two 8 x 8 layers.
He let the cakes cool, and, using a long serrated bread knife, cut the rounded tops off each layer where it had risen so that each layer was perfectly flat. He also measured all the layers, to be sure that, when stacked on top of one another, it would form a cake that was roughly as high as it was square, so that it formed a cube.
Now he stacked the layers together, adding a coating of frosting between the layers (milk chocolate frosting between the chocolate layers, whipped vanilla frosting between the vanilla layers). At that point, he had a cake that was roughly in the shape of a cube.
Next he covered the entire outside of the cake with the whipped vanilla frosting. Now, since the pans had sides that were slightly sloped, and since Jeff did not trim the edges (doing so would have made the cake too high), there were some pretty large gaps on the sides between the layers. These gaps were filled in with frosting, so that the cake was a perfect cube. (Jeff says that people who get end pieces will get as much icing as they will cake!)
Jeff refrigerated the cake overnight so that the frosting would solidify on the outside. The next day, he used the two tubes of black Cake Mate icing to draw squares on each face of the cube. Then, using a well-twisted Rubik's cube as a model, he filled in each square with one of the six tubes of colored frosting.

The colored frosting tubes came with plastic nozzles that made the application of the colored frosting easier.
Congratulations on a fabulous-looking cake, Jeff! I just wish I could be there to see Ryan's face when he sees it.
Tuesday, January 4, 2011
Misnamed Pie
Here's a little secret that most good cooks already know: pumpkin pie is misnamed. The best pumpkin pies aren't made with pumpkin at all; they are generally made with a well-flavored squash like butternut, buttercup, or acorn, or they are made with sweet potatoes. But the iconic pumpkin, the great big orange orb that everyone uses for jack-o'lanterns, is the worst to use for pumpkin pie. It's watery and decidedly lacking in flavor. (Small versions of the big orange pumpkins are actually a different variety, and are very flavorful, so they are good to use.)
However, it's only the cooks who know this. People who are just consumers of pumpkin pie think that they're made of Hallowe'en pumpkins. What's more, these are people who often claim not to like squash. And that's where today's story begins.
Back in the late 80's and early 90's, there was a couple who went to our church named Don and Naomi, while Don was working on his doctorate in theology at McGill University. Don's a very nice guy, and he has strong opinions, which he doesn't hesitate to voice. One day, someone told me that Don had told Naomi in no uncertain terms that he loved pumpkin pie, and that no one would ever be able to pass squash pie off to HIM as pumpkin pie.
Well, for anyone who knows me, them's fightin' words. The challenge was on.
At our next church potluck, I made a squash pie, but of course I advertised it as pumpkin pie. I cleverly maneuvered things to make sure Don got a piece of my pie. I watched him eat every morsel. And then I went for the kill.
"Did you taste my pumpkin pie?" I asked Don innocently. "Yes, I did!" said Don, "It was delicious!"
"So Don," I said, "I believe you owe your wife an apology."
Don looked at me quizzically, and I could see in his expression an indication that it was beginning to dawn on him that he'd been had in some way or another. "Why?" he asked suspiciously.
"Because I heard that you told Naomi that if anyone ever tried to feed you squash pie, you'd KNOW!" I told him.
"No!" said Don, and then he laughed, as he realized just how wrong he'd been.
I don't know if Don ever apologized to Naomi, but I've chuckled about it many times in the years since.
By the way, I thought I'd let you know that Don has recently published a book, called Glimpses of Grace: Reflections of a Prison Chaplain .
So here's my Mom's recipe for "Pumpkin" pie. You can used canned pumpkin if you want, but I recommend just preparing your own. It isn't difficult. I usually put a small squash in the oven whole on a baking sheet, and bake it at 350° for 45 minutes to an hour (longer for a larger squash), until the whole squash feels limp and the skin can be easily pierced with a fork. Cut it open, let it cool a bit, scoop out the seeds, remove the skin (it comes off really easily), and mash the pulp. If you have more than you need, simply put the rest in a freezer bag for the next pie you want to make.
Another note about pumpkin pie - what gives it the iconic taste is really mostly the spices. In the U.S. you can buy a jar of "pumpkin pie spice", although I've never seen that in Canada. I always just use my own blend of spices - roughly equal amounts of cinnamon, nutmeg, ginger, and allspice, with a tiny pinch of cloves.
Pumpkin Pie
1 cup squash puree (see above) or mashed sweet potatoes
4 T. flour
1 T. melted butter
1 egg (for watery pumpkin, 2 eggs)
3/4 cup sugar
1 1/2 cups milk
1 tsp. salt
1 tsp. vanilla extract
2 tsp. pumpkin pie spices (1/2 tsp. each cinnamon, nutmeg, ginger, and allspice, with a tiny pinch of cloves)
Prepare a single shell for a 9-inch pie (half of this recipe).
Combine all ingredients, stir until smooth, pour into pie shell, and bake at 400° for 15 minutes. Reduce heat to 350° and bake an additional 30-40 minutes, until the custard has set.
Cool and serve as is, or with whipped cream or ice cream.
However, it's only the cooks who know this. People who are just consumers of pumpkin pie think that they're made of Hallowe'en pumpkins. What's more, these are people who often claim not to like squash. And that's where today's story begins.
Back in the late 80's and early 90's, there was a couple who went to our church named Don and Naomi, while Don was working on his doctorate in theology at McGill University. Don's a very nice guy, and he has strong opinions, which he doesn't hesitate to voice. One day, someone told me that Don had told Naomi in no uncertain terms that he loved pumpkin pie, and that no one would ever be able to pass squash pie off to HIM as pumpkin pie.
Well, for anyone who knows me, them's fightin' words. The challenge was on.
At our next church potluck, I made a squash pie, but of course I advertised it as pumpkin pie. I cleverly maneuvered things to make sure Don got a piece of my pie. I watched him eat every morsel. And then I went for the kill.
"Did you taste my pumpkin pie?" I asked Don innocently. "Yes, I did!" said Don, "It was delicious!"
"So Don," I said, "I believe you owe your wife an apology."
Don looked at me quizzically, and I could see in his expression an indication that it was beginning to dawn on him that he'd been had in some way or another. "Why?" he asked suspiciously.
"Because I heard that you told Naomi that if anyone ever tried to feed you squash pie, you'd KNOW!" I told him.
"No!" said Don, and then he laughed, as he realized just how wrong he'd been.
I don't know if Don ever apologized to Naomi, but I've chuckled about it many times in the years since.
By the way, I thought I'd let you know that Don has recently published a book, called Glimpses of Grace: Reflections of a Prison Chaplain
.So here's my Mom's recipe for "Pumpkin" pie. You can used canned pumpkin if you want, but I recommend just preparing your own. It isn't difficult. I usually put a small squash in the oven whole on a baking sheet, and bake it at 350° for 45 minutes to an hour (longer for a larger squash), until the whole squash feels limp and the skin can be easily pierced with a fork. Cut it open, let it cool a bit, scoop out the seeds, remove the skin (it comes off really easily), and mash the pulp. If you have more than you need, simply put the rest in a freezer bag for the next pie you want to make.
Another note about pumpkin pie - what gives it the iconic taste is really mostly the spices. In the U.S. you can buy a jar of "pumpkin pie spice", although I've never seen that in Canada. I always just use my own blend of spices - roughly equal amounts of cinnamon, nutmeg, ginger, and allspice, with a tiny pinch of cloves.
Pumpkin Pie
1 cup squash puree (see above) or mashed sweet potatoes
4 T. flour
1 T. melted butter
1 egg (for watery pumpkin, 2 eggs)
3/4 cup sugar
1 1/2 cups milk
1 tsp. salt
1 tsp. vanilla extract
2 tsp. pumpkin pie spices (1/2 tsp. each cinnamon, nutmeg, ginger, and allspice, with a tiny pinch of cloves)
Prepare a single shell for a 9-inch pie (half of this recipe).
Combine all ingredients, stir until smooth, pour into pie shell, and bake at 400° for 15 minutes. Reduce heat to 350° and bake an additional 30-40 minutes, until the custard has set.
Cool and serve as is, or with whipped cream or ice cream.
Saturday, January 1, 2011
Warm up the New Year with Soup!
I didn't fully appreciate soup when I was growing up. I think that was partly due to Mom's attitude toward it - she figured that making soup was as much work as making a regular meal, so if she was going to serve soup, it was going to be a soup that could be eaten as a meal. If we had soup for supper, that was it. So her homemade soups were very hearty, more like stews, really; but I always felt unsatisfied after a meal of nothing but soup. That, and the fact that her version of the soup she served most often as a meal, bean soup, was not my favorite. (However, she also always served piping hot cornbread with bean soup, which was delicious, so I always had this love-hate relationship with her bean soup.)
Mom would also give us canned soup for lunch sometimes - usually either chicken noodle or cream of tomato. They were all right, but of course canned soup can never quite measure up to good homemade soup.
As I've gotten older, I've grown to love soup. There is nothing like a steaming bowl of soup to take the chill off a winter's day. So since New Year's Day has the unfortunate habit of coming in the middle of winter, I thought I'd post some soup recipes that'll warm your innards.
I've already posted recipes for Vegetarian Chili and Roasted Squash Soup. So here are recipes for Garlic Potato Soup (adapted from Garlic Mashed Potatoes), Roasted Red Pepper Soup, Spicy Sausage-Lentil Stew, Cream of Root Vegetable Soup, Mushroom-Barley Soup, and Easy Tomato Soup. Make some soup today, and chase winter away!
One of the best things about soups is that they are very forgiving of substitutions, and can be easily adapted to whatever you have on hand, and to how many people you have to feed. Most soups are also really good - quite frankly, better - left over.
Garlic Potato Soup
2 heads garlic
2 1/2 lbs potatoes
4 T butter
4 T flour
2 cups milk
2 tsp. salt
10 or 12 small (about 1-inch diameter) new potatoes (optional)
chives for decoration
Peel and dice the potatoes. Just cover with water, and add 2 tsp. salt. Bring to the boil, and simmer gently until the potatoes are very soft. Do not drain.
While the potatoes are cooking, separate the garlic into cloves, but do not peel. Drop the garlic cloves into a small saucepan of boiling water, and boil for 2 minutes. Drain, and run cool water over the garlic until it is cool enough to handle. Peel the garlic cloves.
In a medium saucepan, cook the garlic cloves in the butter over very low heat for about 20 minutes, until they are very soft but not browned. Add the flour, and let the flour bubble in the butter for two minutes, stirring constantly. Bring the milk to a boil in a small saucepan, and add the boiling milk all at once to the garlic, butter and flour. Stir and cook until the sauce thickens. Put the sauce through a sieve or puree it in a blender.
Mash the potatoes with a potato masher or a hand-held blender in the water in which they have cooked until they are roughly pureed. Add the garlic sauce to the potatoes.
If you can find small new potatoes, boil about a dozen of them just until they are tender. Cut them in half, and drop them into the soup for texture.
Decorate with chopped chives, and serve piping hot.
Roasted Red Pepper Soup
1 lb. sausage
1 large or 2 medium onions, diced
3 or 4 fresh chili peppers, chopped
3 cloves garlic, minced
3 or 4 carrots, diced
2 or 3 potatoes, diced
2 cups green lentils
1 tsp salt
3 cups tomato juice
1 T (or more) fresh herbs as desired (rosemary, marjoram, or thyme)
Break the sausage up into chunks, and brown in a large soup pot. When some of the fat from the sausage has rendered, add the onions and chili peppers to the sausage. (If using a low-fat sausage, you may need to add a bit of vegetable oil.) Cook until the onions are translucent, and then add the garlic and carrots. Cook until the garlic is soft, but do not let it burn.
Add the lentils and the salt, and stir to coat the lentils with the cooking fat. Add the tomato juice along with an equal amount of water, and the fresh herbs.
Cook for about 20 minutes, until the lentils are beginning to soften. Add the diced potatoes, and cook another 15 or 20 minutes, until the potatoes and lentils are tender.
Delicious on a cold winter's day!
Cream of Root Vegetable Soup
In Mastering the Art of French Cooking , in talking about Potage Parmentier (French leek and potato soup), Julia Child says:
1 lb. each of potatoes, white onions, parsnips, and white turnips
1 T. salt
1/2 tsp. white pepper (optional)
2 cups table cream
Peel and dice the potatoes, onions, parsnips, and turnips. Cover with water, add salt and white pepper, bring to a boil, and simmer until all the vegetables are uniformly soft, about 40 minutes.
Puree the soup in a blender or a food processor. Return to the soup pot, and add the cream.
This soup can be served hot in the winter, or icy cold in the summer. Your guests will never guess what's in it. I have had people who are avowed haters of turnips who absolutely loved this soup.
Mushroom-Barley Soup
1/2 cup pearl barley
6 1/2 cups water
1/2 tsp. salt
3 T soy sauce
3 T dry sherry (optional)
3 T butter
3 cloves garlic, minced
1 cup chopped onions
1 lb. fresh mushrooms, sliced
freshly ground black pepper
Cook the barley and 1 1/2 cups water in the soup pot until tender. Add the remaining water, soy sauce, and optional sherry.
Saute the onions and garlic in the butter until the onions are translucent. Add the sliced mushrooms and the salt. When the mushrooms are tender, add them to the barley. Be sure to include any juices that the vegetables have expressed.
Give the soup a generous grinding of black pepper, and simmer very gently for about 20 minutes, covered. Taste and correct for seasoning.
Delicious served with a good loaf of whole grain bread and some Swiss cheese.
Easy Tomato Soup
I have adapted this recipe from More with Less . I'm almost embarrassed to include it, but there's a good story that goes along with it. When my friend Anne-Marie was living, I was at her place one day, and she said she had nothing in the house to eat. Well, I scrounged around the cupboards, and found a can of tomato juice, an onion, and a bit of flour. Anne-Marie was so astonished that I was able to turn those simple ingredients into a delicious soup, in just a few minutes, that she was convinced I was a culinary genius, and sang my praises as a cook from that day forth. Here's the recipe:
2 cups tomato juice
1 medium onion, chopped
1 clove garlic, minced
2 T. vegetable oil or butter
3 T. flour
1/2 tsp salt
fresh black pepper
1 T fresh herbs (basil, oregano, or thyme)
Saute the onion and garlic in the vegetable oil or butter until they are soft. Blend in the flour, salt, pepper, and herbs, and let the flour bubble in the oil for about 2 minutes.
Gradually whisk in the tomato juice, while stirring constantly. Bring to the boil, continuing to whisk, until soup thickens. Boil 1 min.
Delicious as is, or if you'd like, you can add a cup or two of milk or cream to make cream of tomato soup.
Mom would also give us canned soup for lunch sometimes - usually either chicken noodle or cream of tomato. They were all right, but of course canned soup can never quite measure up to good homemade soup.
As I've gotten older, I've grown to love soup. There is nothing like a steaming bowl of soup to take the chill off a winter's day. So since New Year's Day has the unfortunate habit of coming in the middle of winter, I thought I'd post some soup recipes that'll warm your innards.
I've already posted recipes for Vegetarian Chili and Roasted Squash Soup. So here are recipes for Garlic Potato Soup (adapted from Garlic Mashed Potatoes), Roasted Red Pepper Soup, Spicy Sausage-Lentil Stew, Cream of Root Vegetable Soup, Mushroom-Barley Soup, and Easy Tomato Soup. Make some soup today, and chase winter away!
One of the best things about soups is that they are very forgiving of substitutions, and can be easily adapted to whatever you have on hand, and to how many people you have to feed. Most soups are also really good - quite frankly, better - left over.
Garlic Potato Soup
2 heads garlic
2 1/2 lbs potatoes
4 T butter
4 T flour
2 cups milk
2 tsp. salt
10 or 12 small (about 1-inch diameter) new potatoes (optional)
chives for decoration
Peel and dice the potatoes. Just cover with water, and add 2 tsp. salt. Bring to the boil, and simmer gently until the potatoes are very soft. Do not drain.
While the potatoes are cooking, separate the garlic into cloves, but do not peel. Drop the garlic cloves into a small saucepan of boiling water, and boil for 2 minutes. Drain, and run cool water over the garlic until it is cool enough to handle. Peel the garlic cloves.
In a medium saucepan, cook the garlic cloves in the butter over very low heat for about 20 minutes, until they are very soft but not browned. Add the flour, and let the flour bubble in the butter for two minutes, stirring constantly. Bring the milk to a boil in a small saucepan, and add the boiling milk all at once to the garlic, butter and flour. Stir and cook until the sauce thickens. Put the sauce through a sieve or puree it in a blender.
Mash the potatoes with a potato masher or a hand-held blender in the water in which they have cooked until they are roughly pureed. Add the garlic sauce to the potatoes.
If you can find small new potatoes, boil about a dozen of them just until they are tender. Cut them in half, and drop them into the soup for texture.
Decorate with chopped chives, and serve piping hot.
Roasted Red Pepper Soup
Here in Quebec, red bell peppers are ridiculously expensive for eleven months out of the year. Then, in September, when the local crop ripens, overflowing baskets of them appear in the markets, and they become dirt cheap for a few weeks. That's when I make my roasted red pepper soup. Here's the recipe:
8 large red bell peppers
3 jalapeno or other hot peppers (fresh)
3 or 4 ears corn
2 heads garlic
1/2 tsp salt
2 tsp chili powder
The first step is to roast the peppers (you can roast the bell peppers and the jalapeno at the same time). If you've never done it before, there are two ways you can do it: either in the oven under the broiler, or on a barbecue grill. Arrange the peppers on a broiling pan or on the grill, and roast at a high temperature until the skin blisters and begins to blacken. Turn the peppers 1/4 turn, and repeat until the peppers are blistered and blackened on all sides. Remove the peppers from the heat, and let cool.
When the peppers have cooled enough to handle, remove the skins, stems, and seeds, and put the roasted peppers into a bowl. Be sure to save any liquid that the peppers have thrown off. (Be careful to wash your hands after handling the jalapenos - you don't want to touch your eyes with those peppers on your fingers!)
Meanwhile, cut the tops off the heads of garlic, and roast them at 350 until they are soft. Squeeze the roasted garlic into the pepper mixture.
Put the roasted peppers and garlic into a food processor or blender and puree. (I like a food processor better. The blender makes it too smooth; the food processor leaves it slightly chunky.)
While the peppers are roasting, shuck the corn, and steam it in a Dutch oven in about 1/2 inch of water for 7 minutes. Remove the corn to a colander to cool, but reserve the cooking liquid.
Add the pepper puree to the corn liquid. Cut the corn from the cob, and add it to the soup. Add salt and chili powder (more or less to taste), and return to the boil. If the soup is too thick, you can add a bit more water.
You can use more jalapenos or fewer, depending on how spicy you like your soup. A word of caution: I once decided I wanted it to be really spicy, and used six jalapenos. This was a mistake. Also, you should be aware that jalapenos vary in their degree of hotness. It's better to try adding one or two, and testing the soup, before adding more.
Serve as is, or with a dollop of sour cream. (If you've used too many jalopenos, the sour cream will help cool your mouth down.)
Spicy Sausage-Lentil Stew
1 lb. sausage
1 large or 2 medium onions, diced
3 or 4 fresh chili peppers, chopped
3 cloves garlic, minced
3 or 4 carrots, diced
2 or 3 potatoes, diced
2 cups green lentils
1 tsp salt
3 cups tomato juice
1 T (or more) fresh herbs as desired (rosemary, marjoram, or thyme)
Break the sausage up into chunks, and brown in a large soup pot. When some of the fat from the sausage has rendered, add the onions and chili peppers to the sausage. (If using a low-fat sausage, you may need to add a bit of vegetable oil.) Cook until the onions are translucent, and then add the garlic and carrots. Cook until the garlic is soft, but do not let it burn.
Add the lentils and the salt, and stir to coat the lentils with the cooking fat. Add the tomato juice along with an equal amount of water, and the fresh herbs.
Cook for about 20 minutes, until the lentils are beginning to soften. Add the diced potatoes, and cook another 15 or 20 minutes, until the potatoes and lentils are tender.
Delicious on a cold winter's day!
Cream of Root Vegetable Soup
In Mastering the Art of French Cooking
, in talking about Potage Parmentier (French leek and potato soup), Julia Child says:"..you can use your imagination to the full. Many of the delicious soups you eat in French homes and little restaurants are made just this way, with a leek-and-potato base to which leftover vegetables and a few fresh items are added. You can also experiment on your own combinations....You may find you have invented a marvelous concoction, which you can keep as a secret of the house."Well, this is my marvelous concoction, but it's a secret no longer.
1 lb. each of potatoes, white onions, parsnips, and white turnips
1 T. salt
1/2 tsp. white pepper (optional)
2 cups table cream
Peel and dice the potatoes, onions, parsnips, and turnips. Cover with water, add salt and white pepper, bring to a boil, and simmer until all the vegetables are uniformly soft, about 40 minutes.
Puree the soup in a blender or a food processor. Return to the soup pot, and add the cream.
This soup can be served hot in the winter, or icy cold in the summer. Your guests will never guess what's in it. I have had people who are avowed haters of turnips who absolutely loved this soup.
Mushroom-Barley Soup
1/2 cup pearl barley
6 1/2 cups water
1/2 tsp. salt
3 T soy sauce
3 T dry sherry (optional)
3 T butter
3 cloves garlic, minced
1 cup chopped onions
1 lb. fresh mushrooms, sliced
freshly ground black pepper
Cook the barley and 1 1/2 cups water in the soup pot until tender. Add the remaining water, soy sauce, and optional sherry.
Saute the onions and garlic in the butter until the onions are translucent. Add the sliced mushrooms and the salt. When the mushrooms are tender, add them to the barley. Be sure to include any juices that the vegetables have expressed.
Give the soup a generous grinding of black pepper, and simmer very gently for about 20 minutes, covered. Taste and correct for seasoning.
Delicious served with a good loaf of whole grain bread and some Swiss cheese.
Easy Tomato Soup
I have adapted this recipe from More with Less
. I'm almost embarrassed to include it, but there's a good story that goes along with it. When my friend Anne-Marie was living, I was at her place one day, and she said she had nothing in the house to eat. Well, I scrounged around the cupboards, and found a can of tomato juice, an onion, and a bit of flour. Anne-Marie was so astonished that I was able to turn those simple ingredients into a delicious soup, in just a few minutes, that she was convinced I was a culinary genius, and sang my praises as a cook from that day forth. Here's the recipe:2 cups tomato juice
1 medium onion, chopped
1 clove garlic, minced
2 T. vegetable oil or butter
3 T. flour
1/2 tsp salt
fresh black pepper
1 T fresh herbs (basil, oregano, or thyme)
Saute the onion and garlic in the vegetable oil or butter until they are soft. Blend in the flour, salt, pepper, and herbs, and let the flour bubble in the oil for about 2 minutes.
Gradually whisk in the tomato juice, while stirring constantly. Bring to the boil, continuing to whisk, until soup thickens. Boil 1 min.
Delicious as is, or if you'd like, you can add a cup or two of milk or cream to make cream of tomato soup.
Thursday, December 30, 2010
Fleisch's Axiom
My friend Fleisch (who had a supporting role in another blog post) is not much of a cook. Unlike me, she does not enjoy cooking (a character trait which she inherited from her mother), unless one considers making a sandwich to be cooking. However, she is very enthusiastic about food prepared by others, and does not hesitate to make pronouncements about food. I have dubbed one of these pronouncements "Fleisch's Axiom," and it states:

It is difficult to find exceptions to Fleisch's Axiom.
So today's blog post is a tribute to Fleisch's axiom, with three recipes. There is one recipe, Garlic Mashed Potatoes (adapted from Mastering the Art of French Cooking, Vol. 1) which uses massive amounts of garlic. The next, Chocolate Mousse with Rum (adapted from The 1997 Joy of Cooking ) uses a lot of whipped cream. And the third, Raw Vegetable Dip with Horseradish and Garlic, uses both. (Of course, one thinks of raw vegetables as a healthy snack. This dip completely negates the health aspect of the veggies, but it is very tasty!)
If you should happen to have any garlic mashed potatoes left over, they are delicious the next morning for breakfast. Simply drop a serving of them into hot butter in a skillet, and cook over medium heat until they develop a golden crust. Flip, and do the same thing on the other side. Serve with scrambled eggs for a delightful breakfast.
Garlic Mashed Potatoes
5 lbs. potatoes (Idaho-type potatoes work best for this recipe)
4 heads of garlic (Yes, you read that correctly. Do not attempt this recipe with any less than that.)
1/2 cup (1/4 lb.) butter
4 T flour
1/2 tsp salt
1/4 tsp pepper
2 cups milk
A few tablespoons cream (optional)
Peel and dice the potatoes. Cover with salted water, and boil until tender.
Separate the garlic into cloves (depending on the garlic, there will probably be 50 to 60 cloves). Bring a small saucepan of water to the boil, and drop the cloves of garlic into the boiling water. Boil for 2 minutes, and drain. Rinse the garlic with cold water so they are easier to handle, and peel.
In a medium saucepan, melt 1/4 lb. butter. Cook the garlic in the melted butter on very low heat for about 20 minutes, or until the garlic is very tender but not browned.
When the garlic is very soft, increase the heat slightly, and add the flour. Let the flour froth in the butter for 2 minutes, but do not let it brown.
While the butter and flour are frothing, heat the 2 cups of milk to nearly boiling. Off the heat, pour all the boiling milk into the butter, flour, and garlic at once, add the salt and pepper, and beat vigorously. Return to the heat, and boil for 1 minute, stirring constantly.
Drain the potatoes, and return to the pot. Add the garlic sauce, and whip with a hand mixer until the potatoes are smooth. If necessary for a smooth consistency, you may add a few tablespoons of cream or milk to the potatoes.
Serve piping hot. This recipe makes a lot of mashed potatoes, at least enough for 10-12 servings. But people also tend to eat more of these than they do normal mashed potatoes.
Chocolate Mousse with Rum
1/4 cup sugar
4 T rum
1/4 lb. semisweet chocolate
500 ml (1 pint) whipping cream
2 egg whites
Cook the sugar and rum together over very low heat until dissolved, but do not let it brown.
In a double boiler, melt the chocolate. When the chocolate has melted, beat in 3 T. of the whipping cream. Add the syrup to the melted chocolate, and stir until smooth. Set the chocolate mixture aside to cool.
Whip the egg whites until they form stiff peaks. When the chocolate mixture has cooled (but not chilled), fold the egg whites into it.
Whip the rest of the cream until stiff. Fold the chocolate and egg white mixture gently into the whipped cream.
Spoon the mousse into champagne flutes or sherbet glasses, and chill. Makes 8-10 servings.
Raw Vegetable Dip with Horseradish and Garlic
1 cup mayonnaise
1/2 cup ketchup
1 tsp. Worcestershire sauce
1 or 2 cloves garlic
2 T prepared horseradish
500 ml (1 pint) whipping cream
Mince the garlic very finely, or put it through a garlic press. Combine the mayonnaise, ketchup, Worcestershire sauce, garlic, and horseradish. Whip the cream (unsweetened, of course), and fold it into the mayonnaise and ketchup mixture.
Let chill until firm. Serve with plates of raw vegetables.
All foods can be divided into two categories: Foods which are improved by adding garlic, and foods which are improved by adding whipped cream.

It is difficult to find exceptions to Fleisch's Axiom.
So today's blog post is a tribute to Fleisch's axiom, with three recipes. There is one recipe, Garlic Mashed Potatoes (adapted from Mastering the Art of French Cooking, Vol. 1
) which uses massive amounts of garlic. The next, Chocolate Mousse with Rum (adapted from The 1997 Joy of Cooking) uses a lot of whipped cream. And the third, Raw Vegetable Dip with Horseradish and Garlic, uses both. (Of course, one thinks of raw vegetables as a healthy snack. This dip completely negates the health aspect of the veggies, but it is very tasty!)If you should happen to have any garlic mashed potatoes left over, they are delicious the next morning for breakfast. Simply drop a serving of them into hot butter in a skillet, and cook over medium heat until they develop a golden crust. Flip, and do the same thing on the other side. Serve with scrambled eggs for a delightful breakfast.
Garlic Mashed Potatoes
5 lbs. potatoes (Idaho-type potatoes work best for this recipe)
4 heads of garlic (Yes, you read that correctly. Do not attempt this recipe with any less than that.)
1/2 cup (1/4 lb.) butter
4 T flour
1/2 tsp salt
1/4 tsp pepper
2 cups milk
A few tablespoons cream (optional)
Peel and dice the potatoes. Cover with salted water, and boil until tender.
Separate the garlic into cloves (depending on the garlic, there will probably be 50 to 60 cloves). Bring a small saucepan of water to the boil, and drop the cloves of garlic into the boiling water. Boil for 2 minutes, and drain. Rinse the garlic with cold water so they are easier to handle, and peel.
In a medium saucepan, melt 1/4 lb. butter. Cook the garlic in the melted butter on very low heat for about 20 minutes, or until the garlic is very tender but not browned.
When the garlic is very soft, increase the heat slightly, and add the flour. Let the flour froth in the butter for 2 minutes, but do not let it brown.
While the butter and flour are frothing, heat the 2 cups of milk to nearly boiling. Off the heat, pour all the boiling milk into the butter, flour, and garlic at once, add the salt and pepper, and beat vigorously. Return to the heat, and boil for 1 minute, stirring constantly.
Drain the potatoes, and return to the pot. Add the garlic sauce, and whip with a hand mixer until the potatoes are smooth. If necessary for a smooth consistency, you may add a few tablespoons of cream or milk to the potatoes.
Serve piping hot. This recipe makes a lot of mashed potatoes, at least enough for 10-12 servings. But people also tend to eat more of these than they do normal mashed potatoes.
Chocolate Mousse with Rum
1/4 cup sugar
4 T rum
1/4 lb. semisweet chocolate
500 ml (1 pint) whipping cream
2 egg whites
Cook the sugar and rum together over very low heat until dissolved, but do not let it brown.
In a double boiler, melt the chocolate. When the chocolate has melted, beat in 3 T. of the whipping cream. Add the syrup to the melted chocolate, and stir until smooth. Set the chocolate mixture aside to cool.
Whip the egg whites until they form stiff peaks. When the chocolate mixture has cooled (but not chilled), fold the egg whites into it.
Whip the rest of the cream until stiff. Fold the chocolate and egg white mixture gently into the whipped cream.
Spoon the mousse into champagne flutes or sherbet glasses, and chill. Makes 8-10 servings.
Raw Vegetable Dip with Horseradish and Garlic
1 cup mayonnaise
1/2 cup ketchup
1 tsp. Worcestershire sauce
1 or 2 cloves garlic
2 T prepared horseradish
500 ml (1 pint) whipping cream
Mince the garlic very finely, or put it through a garlic press. Combine the mayonnaise, ketchup, Worcestershire sauce, garlic, and horseradish. Whip the cream (unsweetened, of course), and fold it into the mayonnaise and ketchup mixture.
Let chill until firm. Serve with plates of raw vegetables.
Friday, December 24, 2010
Merry Christmas to all!
It's Christmas Eve, and I've had a busy day.
For the first time in many years, I am not going to be able to go to Maryland for Christmas. So I decided to cook a little Christmas dinner for a few friends who also do not have much family in Montreal. I've spent most of today cooking. I've made rosemary-roasted nuts, cream of peanut soup, cornbread stuffing, apple pie, and cranberry sauce. Tomorrow I have to roast the turkey, cook the stuffing, make garlic mashed potatoes, and roast the vegetables. None of those tasks are very onerous, so tomorrow should be a great deal of fun.
Tonight we had our Christmas Eve service at church (with lots of lovely Christmas carols), and then we went to Kit's house for drinks and snacks afterward. I made egg nog, and brought some of the rosemary-roasted nuts.
Let me tell you about how I came to make the rosemary-roasted nuts.
On Wednesday night, I was on may way home from work on the Metro. The train had just left Charlevoix station and was on its way to Lasalle station, when suddenly, it lost power and came to an abrupt halt in the middle of the tunnel. We could overhear the two drivers on the intercom, saying that there was a fire at Lasalle station. Then we began to smell smoke, and there was an announcement that service on the Green Line was interrupted due to smoke in the tunnel. Well, the smell of the smoke wasn't that strong, but they clearly weren't going to start the train again any time soon. Eventually they came on the intercom and told us that we would have to evacuate the train, and walk back through the tunnel to Charlevoix station. The walk was arduous, on a narrow ledge on the side of the tunnel above the track, with only a grimy handrail to hold onto. By the time I got back to the station, I was exhausted.
Of course there were no buses at the station to pick up all the stranded commuters. Fortunately, I used to live near Charlevoix station, and my friends Rebecca and John live near there. So I phoned their house, and Rebecca answered. "Rebecca, would you like to do a Good Samaritan deed for the day?" I asked. I explained my predicament, and asked if she could drive me the rest of the way home. "I'll be there in five minutes," Rebecca replied.
It took her slightly more than five minutes, but I didn't mind. When I sat in the car, she handed me a parchment paper envelope filled with warm nuts. "I was just making these when you called," she said, "and I took a little longer because I wanted to bring you some."
I tasted them. They were wonderful. They were sweet, salty, and spicy, all at the same time, and still slightly warm. It made the whole ordeal seem not so bad.
Afterward, I decided that the nuts would make a marvelous accompaniment to my cranberry and gin punch that I plan on serving to my dinner guests when they arrive. So I asked Rebecca for the recipe, and made some myself.
Thank you, Rebecca, for rescuing me, and for the gift of those delicious nuts!
Rosemary-roasted nuts
1 lb. unsalted mixed nuts
1/3 cup butter
2 T. fresh rosemary leaves, finely chopped
3 T. brown sugar
1 T. white sugar
1/2 tsp cayenne pepper (a whole teaspoon if you enjoy things spicy)
a pinch freshly-ground black pepper
2 tsp. kosher salt or sea salt
Heat oven to 375°.
Spread the nuts onto a baking sheet, and roast them in a 375° oven for about ten minutes, or just until they begin to be fragrant and change color slightly. Remove from oven.
In a saucepan large enough to accommodate all the nuts, melt the better, and add the chopped rosemary leaves, brown and white sugar, cayenne pepper, black pepper, and salt. Bring to a boil, and cook 2 minutes, stirring constantly. Add the nuts, and stir well to ensure all the nuts are evenly coated.
Spread coated nuts on the baking sheet again to cool. They are wonderful if eaten warm, or if left to cool completely.
Cranberry and gin punch
1 liter cranberry juice cocktail
1 liter club soda
375 ml (about a cup and a half) dry gin
a little splash of Grand Marnier or other orange liqueur
Serve over ice.
Sunday, December 19, 2010
Serendipity - Updated with Margaret's recipe
**Update** - Margaret got back into town, and she shared her recipe with me. It turns out that my memory, as often happens, was faulty. It was not Cayenne Zucchini Bread that she made, but Cayenne Pumpkin bread. Jump ahead for the recipe.
Necessity is the mother of invention, the saying goes. And dumb luck never hurts, either. Often a cook will have to substitute what's available for what's called for in the recipe, and discover that the substitution works better. But sometimes the best cooking inventions come about totally by accident. That's what I call serendipity.
Just today, as the gang from church was having a post-church brunch in the restaurant across the street, Pat (who starred in another one of my posts, with her name poorly disguised) was telling me about a baby shower she was hosting at her house. She was baking a cake for the guests, and had poured the cake batter into a springform pan instead of a tube pan. The time for the guests to arrive was swiftly approaching, but the cake was far from done. While the edges were cooked, the center was still soft and gooey. So she took the cake from the oven, scooped out the soft center, and returned it to the oven. Meanwhile, she whipped some cream with a little sugar and some lemon zest. She had already prepared some lemon custard with sweetened condensed milk. Once the center batter had been scooped out, the rest of the cake was ready in short order. Of course, it didn't look very pretty. So Pat removed it from the springform pan, let it cool a bit, filled the center with the lemon custard, and slathered the whole thing with the whipped cream. The dessert was a huge success, and Pat got lots of compliments.
I also remember somezucchini pumpkin bread that my friend Margaret made one time. She passed it around during a church meeting, but apologized for it in advance, saying she didn't know what it was going to taste like. While making it, she had reached into her spice cabinet for what she thought was cinnamon - and dumped in a couple of teaspoons of cayenne pepper instead. It was already stirred into the batter before she realized her mistake. So she baked it anyway, and we all tried a piece. It was delicious! The cayenne pepper gave it just a bit of a bite, and stimulated the taste buds. Now, Margaret makes her zucchini pumpkin bread that way on purpose! (Unfortunately, she's out of town right now - as soon as she gets back, I'm going to get her recipe and publish it. Keep checking this post for the recipe.)
But my favorite serendipitous cooking discovery belongs to my Grandma Sauder. Grandma was a baker par excellence. When she was a young woman, she and her sisters owned and operated a bake shop in Newport News, Virginia. Grandma's specialty was pies.
Grandma's pie crusts were a thing of beauty. They were invariably light and flaky, and always picture-perfect. Once, when I was in my early twenties, I asked her to show me her technique, so I could learn it too. Grandma's preferred shortening was pure lard, and she made pie crusts by feel. Although she used rough measurements, she would always reserve a half cup of the flour when combining it with the lard, and add the rest of the flour only if it felt like it needed it. She did not use a fork or a pastry blender; she always worked the lard in with her hands. I remember she told me that the flour and lard had been properly combined when it felt like coarse cornmeal and small peas. Grandma also said that pure lard took less flour than vegetable shortening. Then, she would add ice cold water, a little at a time, just until the dough held together when pressed between the fingers. She was able to roll her dough out in a way I've never managed.
Try as I might, I've never been able to duplicate Grandma's pie crusts. (My Uncle Don, on the other hand, made pie crusts with her several times, and his are awfully good.) So nowadays, I often just buy pie crust. I'm just never quite satisfied with the ones I make - mostly because I'm comparing them to Grandma's perfection.
Grandma made all kinds of pies. Grandpa was something of a scavenger - he would buy fruits that were about to go bad (or that were already half-bad) for next to nothing, and Grandma would turn them into pies. They would also stop by the side of the road to pick wild fruit. I remember Grandma's elderberry pies. They were one of my favorites. She also made other berry pies, peach pies, mincemeat pies, and shoo fly pies. But Grandma's best pies were her apple pies. They were wonderful. And I'm about to share her secret with you.
Grandma said that she discovered the secret to apple pie because she had five children. She would peel and slice her apples, combine them with the sugar, flour, and spices, and then set them aside while she went and attended to the children's needs. When she got back around to baking the pies, she discovered that the apples, while sitting around, had become a bit soupy. The sugar and the spices had penetrated the apples, and created a sauce. When baked in Grandma's perfect pie crusts, they became the most marvelous apple pies in the world.
Grandma went on to her reward in 1989. But her apple pies live on, as her serendipitous secret has been passed down to succeeding generations. And now you know it, too!

Necessity is the mother of invention, the saying goes. And dumb luck never hurts, either. Often a cook will have to substitute what's available for what's called for in the recipe, and discover that the substitution works better. But sometimes the best cooking inventions come about totally by accident. That's what I call serendipity.
Just today, as the gang from church was having a post-church brunch in the restaurant across the street, Pat (who starred in another one of my posts, with her name poorly disguised) was telling me about a baby shower she was hosting at her house. She was baking a cake for the guests, and had poured the cake batter into a springform pan instead of a tube pan. The time for the guests to arrive was swiftly approaching, but the cake was far from done. While the edges were cooked, the center was still soft and gooey. So she took the cake from the oven, scooped out the soft center, and returned it to the oven. Meanwhile, she whipped some cream with a little sugar and some lemon zest. She had already prepared some lemon custard with sweetened condensed milk. Once the center batter had been scooped out, the rest of the cake was ready in short order. Of course, it didn't look very pretty. So Pat removed it from the springform pan, let it cool a bit, filled the center with the lemon custard, and slathered the whole thing with the whipped cream. The dessert was a huge success, and Pat got lots of compliments.
I also remember some
But my favorite serendipitous cooking discovery belongs to my Grandma Sauder. Grandma was a baker par excellence. When she was a young woman, she and her sisters owned and operated a bake shop in Newport News, Virginia. Grandma's specialty was pies.
Grandma's pie crusts were a thing of beauty. They were invariably light and flaky, and always picture-perfect. Once, when I was in my early twenties, I asked her to show me her technique, so I could learn it too. Grandma's preferred shortening was pure lard, and she made pie crusts by feel. Although she used rough measurements, she would always reserve a half cup of the flour when combining it with the lard, and add the rest of the flour only if it felt like it needed it. She did not use a fork or a pastry blender; she always worked the lard in with her hands. I remember she told me that the flour and lard had been properly combined when it felt like coarse cornmeal and small peas. Grandma also said that pure lard took less flour than vegetable shortening. Then, she would add ice cold water, a little at a time, just until the dough held together when pressed between the fingers. She was able to roll her dough out in a way I've never managed.
Try as I might, I've never been able to duplicate Grandma's pie crusts. (My Uncle Don, on the other hand, made pie crusts with her several times, and his are awfully good.) So nowadays, I often just buy pie crust. I'm just never quite satisfied with the ones I make - mostly because I'm comparing them to Grandma's perfection.
Grandma made all kinds of pies. Grandpa was something of a scavenger - he would buy fruits that were about to go bad (or that were already half-bad) for next to nothing, and Grandma would turn them into pies. They would also stop by the side of the road to pick wild fruit. I remember Grandma's elderberry pies. They were one of my favorites. She also made other berry pies, peach pies, mincemeat pies, and shoo fly pies. But Grandma's best pies were her apple pies. They were wonderful. And I'm about to share her secret with you.
Grandma said that she discovered the secret to apple pie because she had five children. She would peel and slice her apples, combine them with the sugar, flour, and spices, and then set them aside while she went and attended to the children's needs. When she got back around to baking the pies, she discovered that the apples, while sitting around, had become a bit soupy. The sugar and the spices had penetrated the apples, and created a sauce. When baked in Grandma's perfect pie crusts, they became the most marvelous apple pies in the world.
Grandma went on to her reward in 1989. But her apple pies live on, as her serendipitous secret has been passed down to succeeding generations. And now you know it, too!
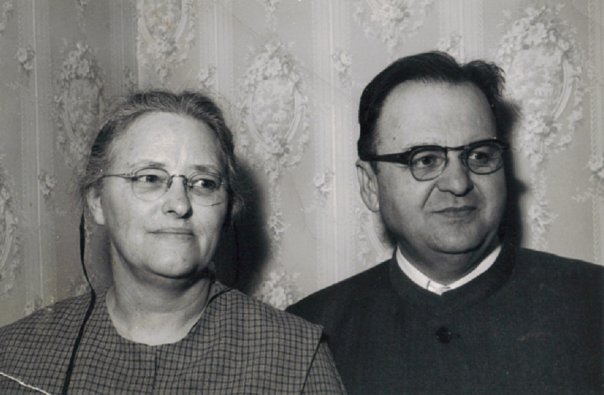
Alice and J. Paul Sauder, 1964
Cayenne Zucchini Pumpkin Bread
1 3/4 cup flour
1/4 tsp baking powder
1 tsp baking soda
1 tsp salt
1 tsp cayenne pepper
1/4 tsp ground cloves
1 1/3 cups sugar
1/3 cup shortening
2 eggs
1 cup pumpkin (cooked or canned)
1/3 cup water
1/2 tsp vanilla
1/2 cup chopped pecans
1/3 cup dried cranberries or dried apricots (or a combination of both)
Preheat oven to 350°.
Combine the dry ingredients, along with the chopped pecans and dried fruit, in a mixing bowl. In a separate bowl, beat the sugar and shortening together until light and fluffy. Add the eggs and beat until smooth. Add the pumpkin, and then the milk and the vanilla, and beat until smooth.
Pour the wet ingredients into the dry ingredients. Stir just until all the dry ingredients have been moistened. The batter will still be lumpy.
Pour batter into a greased loaf pan and bake about 1 hour or until a knife inserted into the center comes out clean.
Cool, slice and serve.
2 1/4 cups flour
2/3 cup pure lard
1/2 tsp salt
1/3 cup cold water
In a mixing bowl, combine the flour and salt (reserving 1/2 cup of the flour). Cut lard into flour with a pastry blender or two knives. (Grandma would have done it with her hands.) Add reserved flour as necessary, but do not overmix; it should feel like a mixture of coarse cornmeal and small peas.
Add water gradually, sprinkling 1 tablespoon of water at a time over the mixture. Combine lightly with a fork until all particles of flour have been dampened. Use only enough water to hold the pastry together when it is pressed between the fingers. It should not feel wet.
Roll dough into a round ball, handling as little as possible. Wrap it in plastic wrap and refrigerate for an hour. Then divide into two balls. Roll out on a lightly floured board. Dough should be about 1/4 inch thick, and 1 inch larger than the diameter of the top of the pie plate.
The second (top) crust does not need to be quite so wide.
3 cups sliced apples
2/3 cup sugar
1 tablespoon flour
1/2 teaspoon cinnamon or nutmeg (or 1/4 tsp of each - I prefer nutmeg)
2 tablespoons milk or cream
2 tablespoons butter (optional)
1/4 cup chopped nuts (optional)
Pastry for two 9-inch crusts (see above)
Note - I have 10-inch deep-dish pie plates. Although the amount of pie dough necessary is about the same (the above recipe will always leave you with leftovers), that extra inch means I need to double the amount of filling.
Combine apples, sugar, flour, spices, and milk or cream in a mixing bowl. Mix together well, and cover with plastic wrap. Set aside (unrefrigerated) for at least 45 minutes; 2 hours is better. Apples will develop a liquid.
Roll out the pie dough, place it in the pie plate, and fill with the apples. Add dots of butter over the top, if desired, and sprinkle on the optional nuts if you are using them. (I don't remember Grandma putting nuts into her apple pies, but I like to do so if I have some on hand.)
Roll out the top crust and place it on the pie, and fasten the top and bottom crust together securely at the edges (dipping your fingers in water helps make this easier). You can also make a lattice crust for the top, if you desire.
Bake in a 400° oven for 50 minutes.
Friday, December 17, 2010
Egg Nog Update
After my last post, my friend Betsy searched through her recipe files, and found her mother's original recipe (which was actually Mrs. Becker's mother-in-law's recipe), written in her own hand!
 (Click on the recipe to see a bigger version of it.)
It turns out that my recollection of the proportions and the technique were pretty accurate; the only thing that I had not remembered correctly was that her recipe called for either rum or brandy in addition to the bourbon. However, I've always made it with just bourbon, and it is excellent that way, too.

It turns out that my recollection of the proportions and the technique were pretty accurate; the only thing that I had not remembered correctly was that her recipe called for either rum or brandy in addition to the bourbon. However, I've always made it with just bourbon, and it is excellent that way, too.
Tuesday, December 14, 2010
Mrs. Becker's Egg Nog - Updated
A quick note to my readers - I recently started a new job. That's why my posts have become much less frequent. But I do plan on continuing the blog!
Well, with the holidays coming up, I thought I'd talk a little bit about egg nog. When I was a youngster, the only egg nog I ever knew was this commercial non-alcoholic stuff that my father used to buy. It was overly sweet, overly thick, overly spiced, and I couldn't take much more than a few sips of it. I had also had non-alcoholic homemade egg nog, at the Shanks' house. The Shanks were our dear family friends, and they would host a New Year's Eve party nearly ever year, and Ann Shank would serve homemade egg nog. It was considerably better than the store-bought stuff. But of course, being raised in a teetotaling household, I had never tasted egg nog the way most people drink it, which is an alcoholic treat.
When I was a little older, I was served egg nog with alcohol a few times at some friends' houses, and I was nonplussed. The alcohol usually tasted too strong, and it just didn't have a pleasant flavor. It was made with rum, and the flavor of the rum overpowered the subtle flavors of the eggs and the milk. So I figured egg nog was just one of those things I didn't like.
And then, one holiday season, I was visiting my friend Betsy Becker's house. I can't even remember why I was there; usually when I was at the Beckers, it was with the whole gang from high school, but this time I don't recall the rest of the gang being there. But some other friends of the Beckers were there, and Mrs. Becker offered everyone some egg nog. Well, I didn't have any high hopes, but I didn't want to appear rude, so I took a glass.
I lifted it to my lips and tasted. It was an altogether marvelous elixir. It was just sweet enough, just creamy enough, just alcoholic enough, and whatever liquor was in it complemented, rather than overpowered, the other flavors. "Mrs. Becker," I exclaimed, "This is wonderful! What is your secret?"
Her secret, it turned out, was bourbon. That was what all the other egg nogs I had been served had been getting wrong. She also used confectioner's sugar to sweeten it. I asked her for her recipe, and she gave it to me.
So I've been making egg nog ever since, and I always call it Mrs. Becker's egg nog. I've long since lost the actual recipe Mrs. Becker gave me, and I just make it from memory. But here is how I do it. If you try to make it, be sure to give Mrs. Becker the credit!
A word of caution: This recipe calls for raw eggs. Raw eggs always carry the risk of salmonella. If that's a concern for you, you probably shouldn't try this. But you'll be missing out. And remember, if you ever stick your finger in the raw cookie dough, or eat your eggs over-easy, you're already taking the risk.
Mrs. Becker's Egg Nog
6 extra-large eggs
1 cup confectioner's (icing) sugar
Bourbon
2 liters milk
1 cup whipping cream
Freshly grated nutmeg
Separate the eggs, and reserve the whites.
In a large punch bowl, beat the egg yolks with a wire whisk until they are lemony yellow. Gradually beat in the confectioner's sugar until the egg yolks and sugar are fluffy. Gradually beat in the bourbon. (How much bourbon, you ask? It depends on how drunk you want your guests to get. I'd start with about a cup or a cup and a half. You can always add more later. You could also omit the bourbon altogether, if you don't want to serve alcohol.)
Now beat in the two liters of milk. This is where you can taste it and add more bourbon if you'd like.
In a separate bowl, beat the egg whites until they are fluffy but still somewhat soft. Float the beaten egg whites on top of the egg nog.
In the same bowl as you beat the egg whites, whip the cream to about the same consistency as you did the egg whites. Float the whipped cream on top of the egg nog with the egg whites.
Please note - you can whip both the egg whites and the cream in the same bowl, but you must whip the egg whites first. If you whip the cream first, the egg whites will never stiffen.
Grate fresh nutmeg over the top and serve. Be sure to refrigerate any leftovers immediately.
This makes quite a bit of egg nog, easily enough for 10 or 15 people.
Update: Betsy Becker tells me that her Mom would sometimes use both bourbon and rum, or bourbon and brandy - but always bourbon. I stick to the bourbon.
Monday, December 6, 2010
Mildred and the Sand Tarts
Mildred was a beagle. She was our family pet in the late 70's and early 80's.
Mildred was a great dog. She was smart, and loyal, and the only one of our beagles who managed to not get herself run over and killed by a car. She loved all of us, but especially my mother - she refused to sleep anywhere else except under Mom's bed.
Mildred was not aware that she was not human. She fully thought of herself as one of the family.
She also had a sweet tooth. Mildred dearly loved candy. At Christmas time, Mom would always have little dishes of hard candies on coffee tables and other places around the house. If you were sitting in a chair next to a dish of candy, Mildred would sit in front of you, shifting her weight from one leg to the other, and whimper softly. She was entirely irresistible, and she would pester you until you gave in and fed her a piece of candy. However, we could leave the house with her alone in it, and she would not steal the candy while we were away. She only ever once tried to steal candy, and that was when there was a dish of candy sitting on top of the piano. We were all in the kitchen when suddenly we heard a loud note from the piano. We went into the living room, and there was Mildred. Her hind legs were on the piano bench, her left leg was poised motionless in mid-air, and her right leg was on the piano key which had told on her. She was looking in our direction, and had an expression on her face that said, "Uh-oh. I got caught." Of course, we all laughed hysterically.


Every year at Christmas, Mom would let us help make sand tarts. Sand tarts are the absolutely tastiest sugar cookies in the entire world. Mom got the recipe from my paternal grandmother, and I'm sure it has been handed down for many generations. I don't know why they are called sand tarts. I suspect it's a bastardization of some German word, but I don't really know. All I know is that they're simple and crisp and buttery and my favorite cookies ever.
So every year, Mom would mix up a batch of sand tarts, roll them out, cut them with cookie cutters, and place them on cookie sheets (or on sheets of aluminum foil, which would later go on the cookie sheets). Then it was our job to brush them with an egg wash and sprinkle them with colored sugar. Then she would bake them, and remove them to a rack to cool. Often, she would make sand tarts (and other Christmas cookies) ahead of time, and put them in the freezer. I got pretty adept at opening the freezer noiselessly and stealing cookies! (Actually, I was a little too good at it - once, I did it so often that Mom ended up not having enough cookies, and I got in trouble.)
So one year, when we were making sand tarts, we thought they would make lovely decorations for the Christmas tree. So we poked little holes in the cookie dough before they were baked, and then when they were cooled, we put ornament hangers in the holes, and decorated the Christmas tree with sand tarts. The tree looked very pretty.
And then, one day, we noticed that there were only sand tarts on the top half of the tree! Mildred had been unable to resist the temptation of the low-hanging cookies, and had eaten them all up.
Here's the recipe for sand tarts. I'm a little hesitant to give it. It seems so easy, but one year I made a batch and took them into the office. Everyone wanted the recipe, and two women actually tried to make them. One of them had cookies that looked perfect, but had absolutely no taste. She vowed that she had used real butter and pure vanilla extract, but I suspect she substituted something somewhere. The other one made cookies that tasted good, but which she had not rolled out very thin, and they were as hard as hockey pucks. So just remember this: use only real butter (I always use salted butter) and pure vanilla extract. And roll them as thinly as you can, less than 1/8 of an inch.
Sand tarts
1 lb. confectioner's (icing) sugar (about 3 3/4 cups, or a little less than 1/2 kg.)
1/2 lb. butter (I use salted butter. If using unsalted butter, you would need to add a little salt to the dough.)
2 eggs
1 lb. flour (3-4 cups)
2 tsp. vanilla
1 egg, beaten with 1 T. water
Colored sugar for decoration (you can buy colored sugar, or just add some food coloring to granulated sugar)
If you have a stand mixer, it is perfect for making sand tarts. Otherwise, you can make the dough by hand, but it will take a little longer.
Cream the butter and sugar together until they are light and fluffy. Add the eggs and vanilla, and mix until they are well incorporated. Add the flour a cup at a time, and mix until the dough has a consistency similar to pie dough, and can be easily rolled out.
Roll out the dough paper-thin - less than 1/8 of an inch thick. Cut them out with cookie cutters or with a glass turned upside-down, and transfer them to cookie sheets. (Because I only have two cookie sheets, I cut all the cookies out and put them onto aluminum foil. I then just transfer the foil to the cookie sheets as each batch comes out of the oven.)
Brush each cookie with the egg wash, and sprinkle with colored sugar. You can also use other decorations such as colored sprinkles or cinnamon hearts.
Bake at 400° for about 8 minutes, or until golden brown. Because they are so thin, sand tarts burn easily, so don't wait for 8 minutes before checking on them. You should check on them at 6 minutes, to ensure they don't burn.
Remove them to a cooling rack. Cookies will crisp up as they cool.
This recipe makes A LOT of cookies - probably 12 dozen or so. I've developed my own tradition living alone - one December Saturday, I put my recording of The Messiah on the CD player, and make sand tarts. By the time The Messiah is finished, so are the sand tarts.
Friday, December 3, 2010
A Clash of Cultures
Warning: This blog post contains coarse language. Reader discretion is advised.
Ever since I first had it as a boy, I have loved Chinese food - that is, once I learned that chicken chow mein wasn't really Chinese, and tasted more authentic Chinese food in a restaurant. As I matured, I learned to love even the more exotic (to a Western palate, anyway) elements of Chinese foods, and learned that saying "Chinese food" is a little akin to saying "European food," because regional Chinese cuisines are as different from one another as Spanish cooking is from German food.
I've never been shy about trying out unusual items on Chinese menus. I love going for dim sum, and the opportunity it provides to sample some of the exotic fare without having to commit to a whole plateful of it. So I've tried chicken's feet (tasty), duck's feet (nasty), tripe (chewy), beef tendons (odd texture), and cuttlefish (yummy if a bit rubbery), among others. It's been said that if it moves, the Chinese will eat it.
In fact, there have been persistent rumors about Chinese restaurants in North America surreptitiously serving up animals we keep as pets to unsuspecting diners as food. Although this rumor has been largely debunked, people still believe that Chinese restaurants serve cat. And that leads me to today's story.
Unlike most of my stories, I can put the exact date on this one. It was October 16, 1979. That was the fall that my beloved Baltimore Orioles were in the World Series against the Pittsburgh Pirates. I had managed to get two tickets to Game 6, and had gone to the game with my best friend from high school, Fleisch. (Fleisch's real name is Suzanne, but we always called her by a shortened version of her last name.) Sadly, the Orioles lost, 4-0. Now, those of us who remember Memorial Stadium in Baltimore remember that the least attractive aspect of that ballpark was the parking. There weren't enough parking spots for a regular-season game, and finding parking for the World Series was next to impossible. Fleisch and I had eventually found parking some distance away, and we were walking back to our car.
As we walked back, we passed a small Chinese carry-out shop. I don't think you could even call it a restaurant, technically, as there were no tables, and not even a chair to sit while your food was being prepared. But we decided we were hungry, and went into the shop. We looked at the menu on the wall, made our selection, ordered, and began waiting for our food.
I can no longer remember what we had to eat. But I can tell you what the two young African-American women who had ordered before us and were waiting for their food had ordered. That is because we overheard their conversation. And it went something like this (and the conversation took place in full ebonics, which somehow made the whole thing funnier, and which I'll attempt to reproduce here):
"I ordered the shrimp. What you order?"
"I ordered the pork."
"Girl, what wrong wit' you? What you doin' orderin' pork in a Chinese restaurant? You ain't never seen no CAT runnin' 'round in back of no Chinese restaurant! You don't order no pork in a Chinese restaurant! You order pork in a Chinese restaurant, you ain't know what you get! That's why I ordered the shrimp. You cain't fool* wit' no shrimp!"
* "Fool" is not the word she actually used. She used a word which begins with the same letter, but which is considerably more vulgar, and would offend many of my readers.
It was all Fleisch and I could do to not break out into guffaws. But we did manage to wait until they had left to laugh out loud. And we've carried that incident with us ever since. Even today, when she and I go out for Chinese food, we'll look at each other and say, "Let's order the shrimp!"
I've never been particularly good at creating Chinese food myself. However, a few years ago, there was a Chinese restaurant in the food court near where I worked that made a dish called "Noodles with Spicy Meat Sauce" which I really liked. I asked what kind of meat was used in it, and they told me pork. It also had lots of seasonings and a peanut-based sauce. I thought that I could probably recreate that one, so I bought some ground pork, and it turned out surprisingly well. As a matter of fact, I think it turned out better than the original. Here's my recipe for it:
Chinese Noodles with Spicy Meat Sauce
1 lb. groundcat pork
3 T. vegetable oil
4 or 5 scallions (green onions), chopped
2 T. freshly grated (or finely chopped) ginger
5 or 6 small chilis, finely chopped (depends on how hot you like it, and how hot the chilis are. You could also use a jalopeno, or dried red pepper flakes, to taste.)
3 large cloves garlic, finely minced
1/2 cup unsalted peanuts
1 cup smooth peanut butter
1 tsp. salt
1 lb. lo mein noodles (You can get these in a Chinese market. You could also just use spaghetti, if you can't find the Chinese noodles.)
Saute scallions, ginger, and chilis in the oil until soft. Add minced garlic, and saute until golden. Add groundcat pork, sprinkle on the salt, and saute until the meat has lost all its red color. Then add the peanuts and peanut butter.
Serve over lo mein noodles. You may need to add some of the water from the noodles to get the proper consistency for the sauce.
Ever since I first had it as a boy, I have loved Chinese food - that is, once I learned that chicken chow mein wasn't really Chinese, and tasted more authentic Chinese food in a restaurant. As I matured, I learned to love even the more exotic (to a Western palate, anyway) elements of Chinese foods, and learned that saying "Chinese food" is a little akin to saying "European food," because regional Chinese cuisines are as different from one another as Spanish cooking is from German food.
I've never been shy about trying out unusual items on Chinese menus. I love going for dim sum, and the opportunity it provides to sample some of the exotic fare without having to commit to a whole plateful of it. So I've tried chicken's feet (tasty), duck's feet (nasty), tripe (chewy), beef tendons (odd texture), and cuttlefish (yummy if a bit rubbery), among others. It's been said that if it moves, the Chinese will eat it.
In fact, there have been persistent rumors about Chinese restaurants in North America surreptitiously serving up animals we keep as pets to unsuspecting diners as food. Although this rumor has been largely debunked, people still believe that Chinese restaurants serve cat. And that leads me to today's story.
Unlike most of my stories, I can put the exact date on this one. It was October 16, 1979. That was the fall that my beloved Baltimore Orioles were in the World Series against the Pittsburgh Pirates. I had managed to get two tickets to Game 6, and had gone to the game with my best friend from high school, Fleisch. (Fleisch's real name is Suzanne, but we always called her by a shortened version of her last name.) Sadly, the Orioles lost, 4-0. Now, those of us who remember Memorial Stadium in Baltimore remember that the least attractive aspect of that ballpark was the parking. There weren't enough parking spots for a regular-season game, and finding parking for the World Series was next to impossible. Fleisch and I had eventually found parking some distance away, and we were walking back to our car.
As we walked back, we passed a small Chinese carry-out shop. I don't think you could even call it a restaurant, technically, as there were no tables, and not even a chair to sit while your food was being prepared. But we decided we were hungry, and went into the shop. We looked at the menu on the wall, made our selection, ordered, and began waiting for our food.
I can no longer remember what we had to eat. But I can tell you what the two young African-American women who had ordered before us and were waiting for their food had ordered. That is because we overheard their conversation. And it went something like this (and the conversation took place in full ebonics, which somehow made the whole thing funnier, and which I'll attempt to reproduce here):
"I ordered the shrimp. What you order?"
"I ordered the pork."
"Girl, what wrong wit' you? What you doin' orderin' pork in a Chinese restaurant? You ain't never seen no CAT runnin' 'round in back of no Chinese restaurant! You don't order no pork in a Chinese restaurant! You order pork in a Chinese restaurant, you ain't know what you get! That's why I ordered the shrimp. You cain't fool* wit' no shrimp!"
* "Fool" is not the word she actually used. She used a word which begins with the same letter, but which is considerably more vulgar, and would offend many of my readers.
It was all Fleisch and I could do to not break out into guffaws. But we did manage to wait until they had left to laugh out loud. And we've carried that incident with us ever since. Even today, when she and I go out for Chinese food, we'll look at each other and say, "Let's order the shrimp!"
I've never been particularly good at creating Chinese food myself. However, a few years ago, there was a Chinese restaurant in the food court near where I worked that made a dish called "Noodles with Spicy Meat Sauce" which I really liked. I asked what kind of meat was used in it, and they told me pork. It also had lots of seasonings and a peanut-based sauce. I thought that I could probably recreate that one, so I bought some ground pork, and it turned out surprisingly well. As a matter of fact, I think it turned out better than the original. Here's my recipe for it:
Chinese Noodles with Spicy Meat Sauce
1 lb. ground
3 T. vegetable oil
4 or 5 scallions (green onions), chopped
2 T. freshly grated (or finely chopped) ginger
5 or 6 small chilis, finely chopped (depends on how hot you like it, and how hot the chilis are. You could also use a jalopeno, or dried red pepper flakes, to taste.)
3 large cloves garlic, finely minced
1/2 cup unsalted peanuts
1 cup smooth peanut butter
1 tsp. salt
1 lb. lo mein noodles (You can get these in a Chinese market. You could also just use spaghetti, if you can't find the Chinese noodles.)
Saute scallions, ginger, and chilis in the oil until soft. Add minced garlic, and saute until golden. Add ground
Serve over lo mein noodles. You may need to add some of the water from the noodles to get the proper consistency for the sauce.
Wednesday, December 1, 2010
Mom Commits a Faux Pas
When we made our trip to Kenya in December 1987 and January 1988, there was a man named Kibugi who attended my sister's church and who came from a rural area in Kenya not far from the town where my brother and sister-in-law were living. Kibugi prevailed upon Carol to carry some Christmas gifts to his mother and family, and she of course obliged.
Let me tell you about the role of mothers in Kenya. Although Kenyan culture remains very patriarchal, motherhood is a state of very high honor. Once a Kenyan woman has borne a child, she is often no longer referred to by her own name, but rather by the honorific "Mama" and the name of her child, usually the firstborn. So I really don't know the name of one of the main characters in this story. We just called her Mama Kibugi, and she was, of course, the mother of my sister's friend.
Once we had arrived in Kenya, my brother contacted Kibugi's family, and told them that we had gifts for them from their son in America, and they arranged to come to Jerry and Donna's house to collect the gifts. They arrived, and were very happy to meet all of us, and thrilled with the presents, which included a fancy dress that Kibugi had sent his mother. And then, as is the Kenyan custom, they insisted that we come to visit them at their home for a meal.
Kenyans are very hospitable people. Even the poorest will invite you into their home, and serve you something, even if it is just tea. (The Kenyans brew their tea very strong, and serve it with equal amounts of hot milk, and very sweet.) It's quite humbling. These people who have even less than North Americans who rely on welfare are always willing to share what little they have. Those who have a little more will, of course, offer their guests more.
I had learned in my earlier trip to Kenya that the highest honor a Kenyan could bestow upon a dinner guest was to serve chicken. It is not budget food there. It is special occasion food. If a rural Kenyan serves chicken, it is not something she bought at the local supermarket or butcher. It is livestock from her back yard that she has slaughtered. It's the African equivalent of killing the fatted calf.
So on the appointed day, we were off to Mama Kibugi's house. There were quite a few of them living in that small house (something that is not all all unusual there). There were several other sons, a daughter-in-law, and some grandchildren, as well as two of Mama Kibugi's sisters. Mama Kibugi was a teacher in a school not far from their house. She had taken the day off work to receive us, but we walked to the school to see where she taught and to meet the schoolchildren. I believe it was the first time some of those children had ever met someone of European descent.

Then we went back to the house for the meal. The Kibugi family is from the Kikuyu tribe. Most traditional Kikuyu food is rather bland, but quite heavy. They make a dish called githeri, which is beans and dried corn cooked together, and they also make something called irio, which is a Kikuyu version of mashed potatoes and peas. Irio is what Mama Kibugi served us that day, along with some fresh fruit, and of course, tea. We ate our fill, and those potatoes and peas were feeling rather heavy in our stomach.
It was only when we were already stuffed with the irio that Mama Kibugi produced a blue-green plastic bowl of chicken. In my mother's defense (and you will soon see why she needs defending), the chicken didn't look very appetizing. It looked like it had just been boiled, and there didn't appear to be any spices or seasoning of any kind on it. The bowl containing the chicken had been covered by a plate, but as soon as the plate was removed, flies started buzzing about it. Mama Kibugi took this plastic bowl of chicken, proffered it to my mother, and said, "Have some chicken." Mom, unaware of the honor that was being bestowed upon her, looked at that rather unappetizing plastic bowl of plain boiled chicken and said, "Oh, my, I've eaten so much today that I don't think I could possibly eat anything else!"
Stunned silence fell over the room. Mama Kibugi looked at my mother with an uncomprehending stare. "But it's chicken!" she said, giving the bowl a little shake.
Mom looked like a deer caught in the headlights. I was just a little too far from her to be able to kick her under the table. So I looked at her with a deadly serious expression on my face, and said quietly but firmly through clenched teeth, "Mother, eat chicken."
Mom got the message. She said, "Well, I'll just have a small piece, then!" and helped herself to a chicken wing. Everyone smiled, the rest of us each took a piece of chicken, and pleasant conversation resumed. An international incident had been averted.
A few years later, Mama Kibugi and one of her sisters came to the U.S. to visit her son. My mother invited them to their house for dinner. And of course, she served chicken!
Here are two pictures of the Kibugi family. The first one is of Mama Kibugi (wearing the dress that her son had sent her), with her sons, daughter-in-law, and grandson. The second is of her two sisters.


Here are some recipes for Kenyan tea, irio, and githeri.
Kenyan Tea
A pot of freshly-brewed black tea, brewed very strong (If you can find tea grown in Kenya, use it.)
Milk which has been brought to the boiling point
Sugar
Pour equal amounts of strong tea and hot milk into a teacup. Add lots of sugar.
Irio
1/2 cup dried green split peas
1 lb. potatoes
1 medium onion, chopped
1 cup canned, frozen, or fresh corn (optional)
2 T. vegetable oil
2 T. butter
1 tsp. salt
A note about the corn - Kenyans do not eat sweet corn. They refer to what they eat as maize, and it is what we would call field corn. For this dish, they would use fresh (not dried) field corn.
Put the dried peas into about 4 cups of water with the salt. Bring to a boil, and reduce the heat. Let simmer for about 20 or 30 minutes, until the peas are beginning to soften.
Peel and dice the potatoes. When the peas have begun to soften, add the potatoes to the peas. Continue cooking until the potatoes and peas are both quite soft.
In a small skillet, saute the onion in the vegetable oil and butter until they are soft. Drain the potatoes and peas (leaving enough liquid to mash them), add the sauteed onions, and mash with a potato masher until they have a smooth consistency. Stir in the optional corn.
Add salt and pepper to taste. You may want to add a little butter for flavor, although the Kenyans would probably not use butter at all. My sister seems to recall Mama Kibugi adding large globs of Crisco to the irio as she mashed it.
Githeri
1 cup dried red kidney beans
1 cup dried corn (see above note on corn - you could use hominy if you can't find dried corn)
1 medium onion, chopped
2 T. vegetable oil
1 tsp. salt
Soak the beans overnight in a large quantity of water. Add the dried corn and salt, and cook together for about 2 hours, or until both the beans and the corn are soft. By the time the beans and corn are done cooking, most of the water should have cooked off.
Saute the onion in the vegetable oil, and add it to the githeri. Stir and add salt and pepper to taste.
Subscribe to:
Posts (Atom)